FJR Owners Forum banner
41 - 60 of 65 Posts
Attention all Gen3A users..... since we've had a few incidents with broken compression valves on the bottom of the cartridges, and the fact you can't get cartridges for '13-'15's......I no longer recommend using an air impact gun to remove the bottom bolt. Manual method better. There are two ways to do this, but likely you'll end up with the second way.....

Just a note on the 16'-ups..... cartridges now have crimped in compression valves, no option but a new cartridge if broken, ie, no aftermarket compression valves will work.

As mentioned for your Voyager, you can start by trying to remove the bottom bolt while the forks are still assembled... wind the preload in all the way to maximize the pressure of the cartridge pushing against the bottom of the fork, which will help keep the cartridge from turning as you loosen the bolt. However, what may happen is, the cartridge will spin, thus you can't unthread the bolt.

So, method two, is to now disassemble the top cap and remove the springs and dump the oil (beware of rebound damping needle and spring falling out into your drain pan). Then use a cartridge holding tool on the brass nut at the top of the cartridge to keep it from spinning. In my pic, I made a prototype from 1" PVC to look like the OEM tool... it worked, but not all that well because it is plastic. Better yet, a simple cheap an EZ one, using 1" thin wall square tubing, a good length is ~16" (12" is a bit too short). Cut slits up the corners approx. 5/8", this leaves you 4 tabs, cut two opposite ones off. Then bend the two remaining out until the opening is ~30mm.

The brass nut on top of the cartridge is 26mm hex, so your 30mm tapered opening will go down and engage two flats of the hex nut. You can drill a hole in the upper end of the tubing for a bolt, or clamp on with some vice grips as a handle. If you did not break the lower bolt loose earlier, do it now (cartridge will spin), then engage the holding tool and finish removing the bolt. Then remove the cartridge.

Once all seals and bushings replaced, tubes back together, put the oil lock piece on the bottom of the cartridge and slide it into the fork. Get the lower bolt started and snug it up until seated. Then you shouldn't really need the cartridge holding tool to torque up the lower bolt...... use only enough torque to seal against the copper washer, do not overtorque. Yammy spec is 25 ft. lbs, remember it's a lubed fastener, so drop that to 18-20 max.


Bushings and Seals...... The only real way to get the seals out is to slide hammer the forks apart, which destroys the lower and middle bushings, and maybe the upper one is salvageable. Two things will help you. An absolute must is heat, on the upper part where the upper bushing and seal reside..... hot enough you can't touch it. First remove the bug deflector pieces....

When slide hammering, it might be beneficial to not be perfectly "in line", since the lower bushing might jam in the middle bushing and bind up. You may have to have a big rubber hammer handy to hammer the inner tube back in to release it..... and as you have likely read, some weren't able to do that and had to resort to other measures. Did they use heat, I don't know. BTW, don't forget to remove the wire seal retaining ring first, lol. DAMHIK.

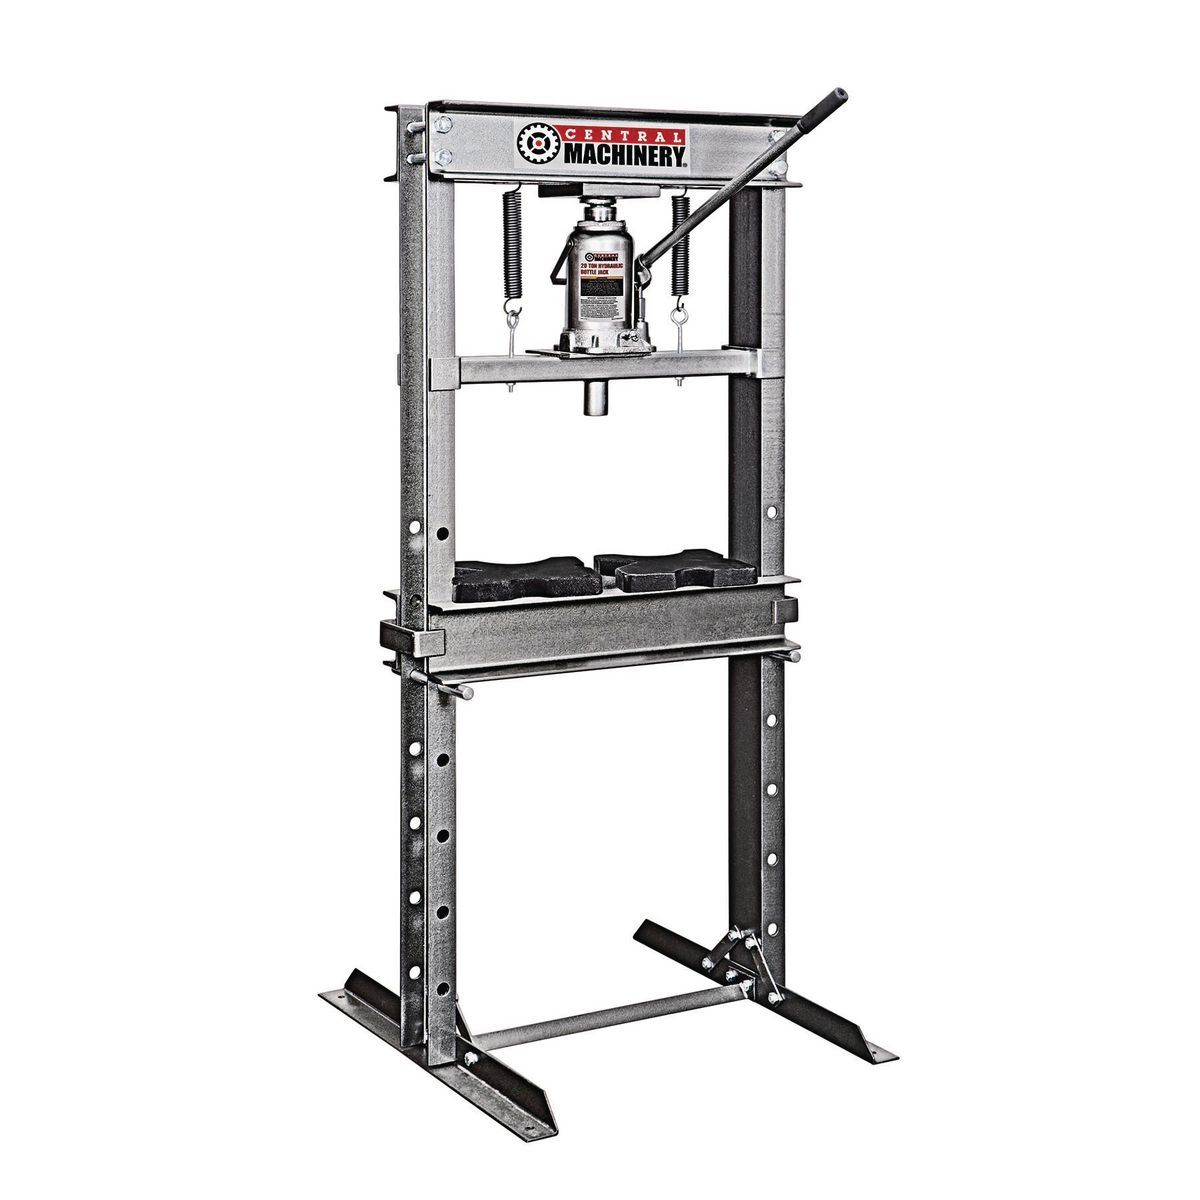
IF you have access to a tall press, you can initially fill the fork with some kind of oil, reinstall the fork cap and hydraulically press the fork together.... it will amaze you with the ease at which the seal eases out under hydraulic pressure.... wish I had room for one.


Image
 
Ray sed--
IF you have access to a tall press, you can initially fill the fork with some kind of oil, reinstall the fork cap and hydraulically press the fork together.... it will amaze you with the ease at which the seal eases out under hydraulic pressure.... wish I had room for one.


Just have to show a little ingenuity.
Park the car with the tire in line with the edge of the garage door opening a little more than a fork leg length away (may have to make several tries to get the right spacing).
Put a plank on edge against the side of the tire.
Place the fork leg full of oil (any oil, it needed replacing anyway) horizontally on top of an oil drain pan between the edge of the door opening and the plank against the tire. Put a deep socket on top of the fork cap.
Place a scissors jack between the socket on top of the fork leg and the plank against the tire.
Spin the scissors jack with the impact gun until the oil seal pushes out of the lower leg. Oil pan catches the mess.
Pick up the parts, put the car back in the garage.

Avoids disassembling the fork leg and slide hammering the bushings if all that's needed is to replace the seal.


Bet the wheels are spinning now!!

dan


Ideas are like rabbits. You get a couple and learn how to handle them, and pretty soon you have a dozen. --John Steinbeck
 
Thanks, Dan, wheels are spinning now...... I'm thinkin' a vertical press I could make.... push up to the top of my garage door opening....
BTW, what do you mean put the car back in the garage? You let cars in yours? 😁 ;)

Just an FYI, if your forks have 30k or so on them, the lower bushing has wear, teflon thinning and copper showing..... however, I've had others at 50k with little wear... non-aggressive rider. But once you have the seal out, slide hammering the upper bushing out should be a lot easier..... I'd still use heat as it is a significant interference fit (more than any other bike's forks I've worked on).
 
Thanks, Dan, wheels are spinning now...... I'm thinkin' a vertical press I could make.... push up to the top of my garage door opening....
I didn't think of parking the car in the garage door opening, put the scissors jack on the hood and push up against the top of the door opening. :unsure:

BTW, what do you mean put the car back in the garage? You let cars in yours?
In my neck of the woods, hail storms are not uncommon any time of the year. IMHO it makes more sense to keep the cars in the garage rather than leaving them outside while protecting $25 worth crap inside. The scooter parks between them. If it saves having to deal with insurance claims and body shops, it's worth the squeeze. I do have to set them outside temporarily sometimes to have room to work on other things.

dan


The road goes on forever, and the party never ends. -- Robert Earl Keen
 
  • Like
Reactions: RaYzerman
I didn't think of parking the car in the garage door opening, put the scissors jack on the hood and push up against the top of the door opening. :unsure:
Nah. Might scratch the hood. Line up the car then let out all the air from the two tires. Line up the tube then re-inflate. It goes without saying of course that you'll have to do each tire in 10 lb increments to keep things straight.

(Hey, you wanted us to spin the wheels.)
 
I wasn't going to use the car..... hydraulic floor jack on the floor, fork on top of it, suitable support post up to the top of the opening... how to keep it all straight, thus the word 'suitable'. Wheels are still spinnin'
 
Avoids disassembling the fork leg and slide hammering the bushings if all that's needed is to replace the seal.
Bet the wheels are spinning now!!
dan

Ideas are like rabbits. You get a couple and learn how to handle them, and pretty soon you have a dozen. --John Steinbeck
I need clarification on this. All is needed at this point is to potentially replace the seal. Don't I have to pull the inner tube and cylinder out to remove the seal and install the new one?

I wish there was a way to pull the oil seal from the top, of course after removing the dust seal and ring, instead of disassembling the fork.
 
I wish there was a way to pull the oil seal from the top, of course after removing the dust seal and ring, instead of disassembling the fork.
There is, and your results may vary. It is possible to remove the seal after removing the dust cover and retaining clip using a seal puller or some sheet metal screws and a vicegrip. You need to be careful not to scratch up the tube and you may not be strong enough to do it. I have not done it on the FJR, but have done it on my FZ1 and other bikes.
 
I need clarification on this. All is needed at this point is to potentially replace the seal. Don't I have to pull the inner tube and cylinder out to remove the seal and install the new one?

I wish there was a way to pull the oil seal from the top, of course after removing the dust seal and ring, instead of disassembling the fork.
Assuming one only want to replace a fork seal without replacing the bushings.
Also, assuming one knows which end of the wrench to hold and is not afraid to DIY and the resulting consequences.

Following the procedure in the FSM. I'm not looking at the FSM at the moment.
Remember, there's more than one way to skin a cat, assuming you want a cat skin.

Loosen the upper triple clamp and loosen the fork cap using a suitable deep socket.
Remove the fork leg from the scooter.
Remove the fork cap and remove the spring. No need to remove the cartridge from the leg, or to slide hammer the bushings out. The spring can be left in, but then one has to work against it. The spring has to come out anyway to measure the proper oil level when reassembling.
With the fork leg fully extended, fill it to the top with oil and replace the fork cap.
Remove the dust seal, remove the oil seal retaining circlip.
Using whatever means available, compress the fork to force the seal out. See what means I had available above. Make up your own means, but if you do something imaginative, please share it with us. That will make somewhat of a mess, be prepared to capture and clean it up. Sometimes the seal will not come out evenly and continuing to compress will just squirt the oil out. Pause for a moment, release the pressure, and tap the high edge of the seal back down, then try again. Work carefully and don't do anything dangerous!
Once the seal is removed, remove the fork cap and drain the oil. Do not lose the damping needle and spring.
Install the new seal and retainer circlip and dust seal. There are dozens of ways, just search for everyone's favorite homemade methods.

This would be a good time to pour some oil or kerosene or some other cleaner of your choice into the fork leg.
Pump vigorously, pump the cartridge vigorously (do not lose the damping needle and spring) and drain. Repeat as necessary.

Fill the fork leg to the proper level with fork oil of your choice.
Install the spring and cap. Don't forget the damping needle and spring and damping rod.
Put the scooter back together.
Go for a ride.

YMMV, no lifeguard on duty, contents may settle, etc.


dan


When you come to a fork in the road, take it. -- Yogi Berra
 
  • Like
Reactions: FastPappy
Assuming one only want to replace a fork seal without replacing the bushings.

Put the scooter back together.
Go for a ride.

YMMV, no lifeguard on duty, contents may settle, etc.


dan


When you come to a fork in the road, take it. -- Yogi Berra
Awesome, this is exactly what I was looking for.

At 16,500 Miles I would expect all I need is a new seal on the left fork. So far the right is fine. But the left fork is not leaking badly, after riding home from work ( 60 miles ), there was thin layer of oil around the dust cap. I had a Kawasaki Voyager 1700 that when the fork started leaking the oil drips were obvious everywhere I parked.
 
I have seen a few forks butchered up by guys trying to remove the seal with various things like Oldjeep is saying. He's absolutely right, you should have experience as a wrench turner before trying it.
The dan cooper method is great.... hey, maybe you got a buddy who has a friend who has one of those presses... I do but he's in VA.

A fork oil leak bad enough to run down the fork leg will get into your brake pads...... wrap a rag around it and zip tie it, see how much leakage you're getting after a ride.......

If you have the room and need more tools........... this will work. OR, copy the concept, which is what dan is saying.

 
  • Like
Reactions: robbyk
So........ prototype...... what if I bolt a length of angle iron on the wall, at the height of a fork, put say a 6' 2x4 on edge under it, suitable something so the fork cap doesn't get damaged, keep the fork within a foot of the wall...... a six foot piece as a pry lever should give me lots of mechanical advantage, yes? If that works, spin the wheels some more.
 
So........ prototype...... what if I bolt a length of angle iron on the wall, at the height of a fork, put say a 6' 2x4 on edge under it, suitable something so the fork cap doesn't get damaged, keep the fork within a foot of the wall...... a six foot piece as a pry lever should give me lots of mechanical advantage, yes? If that works, spin the wheels some more.
I was just thinking about a giant version of a bead breaker!! I think I would anchor the bottom of the fork leg at the floor / wall junction so nothing could jump, with the top end about a foot or maybe less out. A triangle is a very strong geometric form. It doesn't take much travel to push the seal out if the fork is completely full of oil. Actually, the fork leg wouldn't have to be filled with oil, it could be any other liquid. Even water, which would be less of a mess to clean up. :unsure:


dan (spinning his wheels)
 
  • Like
Reactions: RaYzerman
You just need a beer can crusher. Cut the bottom out and mount a separate base to the wall ;)

Image
 
Well, I too encountered this problem with a jammed inner tube in the outer tube. The right fork started leaking on my wife's 2014 FJR1300A, and I decided I would rebuild both forks while I was at it. I started with the left one first, and was able to slide-hammer the oil seal and top bushing with little problem...just took my time and went slow and didn't apply too much force with each slide. It did bind up several times (while pulling the tube out), although I was able to gently smack the bottom of the outer tube on a thick folded rag on the garage floor while holding the inner tube to get it unstuck.

When I got to the right fork, it ended up binding up and I wasn't able to get it unstuck. I tried to get it unbound by the same process that I used on the left fork, but to no avail...I wound up with the inner tube almost bottomed out in the outer tube.

Thanks to your posts on here detailing the success of pulling the inner tube from the outer tube, I devised a clamp to hold the inner tube, and then rigged it up on my cherry picker...and success! Next time, I'll take the time to push the oil seal using the hydraulic pressure method (filling the fork with oil), as I have a press...I figured I could skip this part and just use the slide-hammer method. I do think extracting the oil seal before slide-hammering the bushings will make a difference and just might be able to extract the bushings with a little less force.

I used 1.5" aluminum angle, coupled with U-bolts. I notched the peaks of the aluminum angle where the U-bolts contacted. I also pre-bent the backing piece to a similar shape, and once I tightened the nuts, the backing further formed to the right-angle shape of the aluminum. I also pulled on just one side of the aluminum, as it naturally created a compression clamp on the fork as the pulling force was applied. I also reinstalled the top cap in the fork as some measure of assurance the top of the inner tube would not deform from the force.

Image


Image


The below is a pic after the inner tube was separated from the outer tube...one side of the angle slid a little bit, which just helped to further compress the clamping force on the inner fork. No marring occurred on the inner tube.

Image
 
I recently pulled my Gen1 forks apart to replace the seals and bushings. I first placed the lower leg in the soft jaws of my vice and promptly noticed the upper tube got real tight - I was crushing the tube - a BAD thing. I then gripped the lower tube in the vise on the bottom end where the axle goes thru and luckily the tube returned to shape. After applying a bit of heat from a Bernzo-matic torch on the lower tube, the upper tube along with the bushing and seal popped out quite easy. I now need to find some 2" exhaust tubing to pres the new ones back in. FWIW, my Gen1 cartridge does not have a hex on the top so a socket tool will not work. I used the friction/impact wrench method to remove the cartridge attachment bolts.
 
I recently pulled my Gen1 forks apart to replace the seals and bushings. I first placed the lower leg in the soft jaws of my vice and promptly noticed the upper tube got real tight - I was crushing the tube - a BAD thing. I then gripped the lower tube in the vise on the bottom end where the axle goes thru and luckily the tube returned to shape. After applying a bit of heat from a Bernzo-matic torch on the lower tube, the upper tube along with the bushing and seal popped out quite easy. I now need to find some 2" exhaust tubing to pres the new ones back in. FWIW, my Gen1 cartridge does not have a hex on the top so a socket tool will not work. I used the friction/impact wrench method to remove the cartridge attachment bolts.
Best place to hold the lowers in the vice is by both caliper mounting pads. Assuming you have a vice that you can rotate so that the jaws are vertical.
 
To install the upper bushing, I use the big washer and a piece of 2" ABS or PVC pipe. This also is my seal driver.
Yes, I hold the lower fork by the caliper mounts in the vice.

On Gen1, there is a pressed on washer on the nut on top of the cartridge. What others have done is make a wire hook to get it off, then you can use a tool to hold the cartridge (psst, I've never done it, and used an air impact on the lower bolt).
If not successful getting the bolt out, but loose..... one thing we've had to do (since the Gen1 fork springs are so weak), is to max the preload, then compress the fork (piece of plywood against the fork cap while compressing against your chest). Requires a helper.
 
On Gen1, there is a pressed on washer on the nut on top of the cartridge. What others have done is make a wire hook to get it off...
-> Maybe - I tried it. It is pressed on really hard. I removed them by tapping them with a hammer after I got the forks disassembled. You may be able to remove them using a piece of 1/8" tig rod with a hook on the end and try to pop them off. Yamaha should have just made the washers loose to set them on top of the hex nut. I plan to open up the washer hole a bit with a file so it can be removed easily next time.
 
41 - 60 of 65 Posts